Writing Test Scenario Files
This tutorial will guide you on how to write Behavior Driven Development (BDD) test scenario files, i.e., Feature files, for your application. Even beginners can master the scenario editing functions in CukeTest through these simple steps and create their own automated test cases.
What is BDD Testing?
Behavior Driven Development (BDD) is a development method that uses natural language to write test scenarios, aimed at helping technical and non-technical personnel achieve better communication in project development. BDD focuses on describing the behavior of the system, ensuring that the development team has a consistent understanding of requirements before writing code. You can learn more background information in Why Use Behavior Driven Development (BDD).
Basic Gherkin Syntax
Gherkin is an easy-to-understand structured language used for writing BDD tests. Its main structure includes the following:
- Feature: Defines the main functionality to be tested.
- Scenario: Describes a specific test case.
- Steps: Uses keywords like
Given,When,Thento describe operations and expected results.
With these keywords, you can clearly express test steps and expected behaviors, making it convenient to write and maintain automated test cases.
1. Create a Feature File
The Feature file is the core of BDD testing, used to describe the application's functions and their test cases. CukeTest will automatically generate a features directory for each project to store all Feature files. To create a new Feature file, please follow these steps:
- Open CukeTest and click the New File button
 .
. - Select Feature File and name it (e.g.,
notepad.feature).
After the Feature file is created, you can choose Text Mode or Visual Mode to write test content.
2. Write Test Scenarios
1. Using Text Mode
If you are familiar with Gherkin syntax, you can write test content directly using text mode:
- Click the Text button
 in the upper right corner of the Feature file editing interface to switch to text mode.
 - Enter the following content, which is a simple Notepad test example:
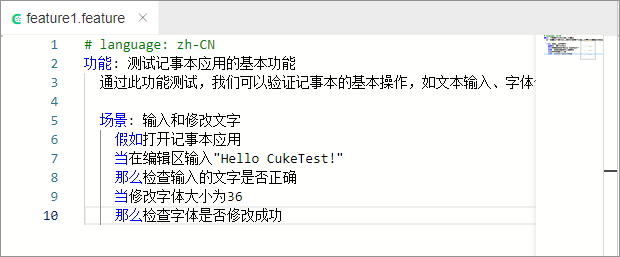
# language: en
Feature: Test Basic Functions of Notepad Application
  Through this feature test, we can verify the basic operations of Notepad, such as text input and font modification.

  Scenario: Enter and Modify Text
    Given Open Notepad application
    When Enter "Hello CukeTest!" in the editing area
    Then Check if the entered text is correct
    When Change font size to 36
    Then Check if the font is modified successfully
    Then Close Notepad application
This mode is suitable for users familiar with Gherkin syntax, allowing implementation of steps directly and quick adjustment of test content.
2. Using Visual Mode
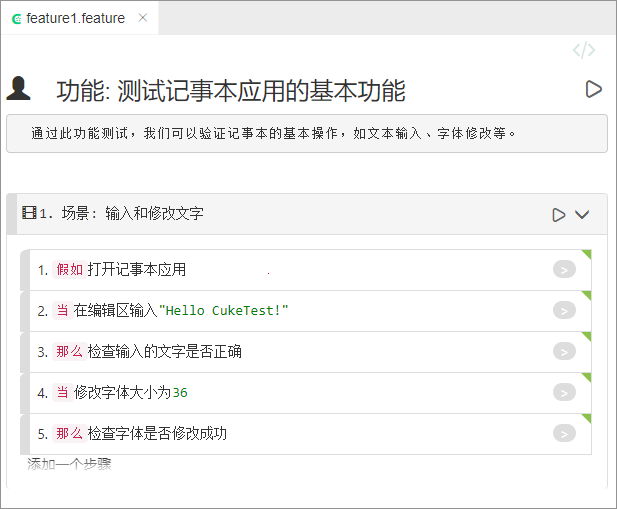
If you are not familiar with Gherkin syntax, CukeTest provides a Visual Editing Interface, where you can quickly create test content by clicking and typing:
- Click the Switch to Visual Interface button in the Feature file.
- Double-click the feature description area and enter "Test Basic Functions of Notepad Application".
- Press
Enterto add a detailed description of the feature (e.g., "Through this feature test, we can verify the basic operations of Notepad, such as text input and font modification").
Create Scenarios and Steps
- Click the Add New Scenario button to create a new scenario.
- Double-click the scenario name and enter "Enter and Modify Text".
- Add test steps, entering each operation step by step, such as "Open Notepad application", "Enter text in the editing area".
This mode is particularly suitable for beginners, enabling them to quickly get started with writing test scenarios even without knowing Gherkin syntax.
3. Implement Automated Test Steps
After writing the test scenario file, you also need to implement the automation code for each test step so that it can be executed automatically during the test run. Depending on the programming language used (such as JavaScript or Python), please refer to the following guides to complete the step implementation: