Developing Pytest Projects
Pytest is a commonly used testing framework in Python projects, offering simple and clear syntax for writing and maintaining test code. Unlike Behavior Driven Development (BDD) frameworks, Pytest projects do not need to write feature files, but directly define test content through functions.
In this tutorial, you will learn how to convert the Automation Code Recorded in CukeTest into test case code compliant with Pytest format.
What is Pytest
Pytest is a lightweight Python unit testing framework, widely used in various testing scenarios due to its simple and flexible syntax and rich plugin support. CukeTest also has built-in support for Pytest, allowing you to easily write and run Pytest projects in CukeTest.
Writing Test Cases
1. Create a Pytest Test File
First, create a test file starting with test_ in the project directory, which allows Pytest to identify it automatically, for example, test_notepad.py. In this file, use the code recorded by CukeTest as a test function, ensuring the naming complies with Pytest specifications:
- Test File Naming: Name files with the
test_prefix, such astest_notepad.py. - Test Method Naming: In the test file, test function names should also start with
test_, for example,test_input_text().
2. Define Test Functions
In the test file, you can directly define test functions and separate the logic of each test case into independent methods. The following example shows pasting the steps recorded by CukeTest into the test_input_text() test method.
For desktop automation testing, when writing step definition functions, you need to ensure that the desktop automation module (e.g.,
WinAuto) and the corresponding Model File have been loaded.
import os
from leanproAuto import RunSettings, WinAuto, Util

# Run settings
RunSettings.set({"slowMo": 1000, "reportSteps": True})
# Load model file
modelWin = WinAuto.loadModel(os.path.dirname(os.path.realpath(__file__)) + "/model1.tmodel")

def test_input_text():
    # Launch application "notepad.exe"
    Util.launchProcess("C:\\Program Files\\LeanPro\\CukeTest\\bin\\notepad.exe")

    # Set control value to "Hello CukeTest!"
    modelWin.getEdit("QTextEdit").set("Hello CukeTest!")

    # Check text content
    modelWin.getEdit("QTextEdit").checkProperty("Text.text", "Hello CukeTest!")

    # Adjust font size
    modelWin.getButton("Font").click()
    modelWin.getList("QFontListView").select("36")
    modelWin.getButton("OK").click()

    # Verify screenshot
    modelWin.getVirtual("QTextEdit_image").checkImage()

    # Close application
    modelWin.getButton("Close").click()
3. Reuse Settings and Load Model Files
To improve code reusability, you can place RunSettings and model loading operations at the beginning of the file to share them among all test cases. If you have multiple test cases and want to launch the application only once during the entire test process, you can use the pytest_sessionstart() and pytest_sessionfinish() methods in the conftest.py file to control the startup and shutdown of the application.
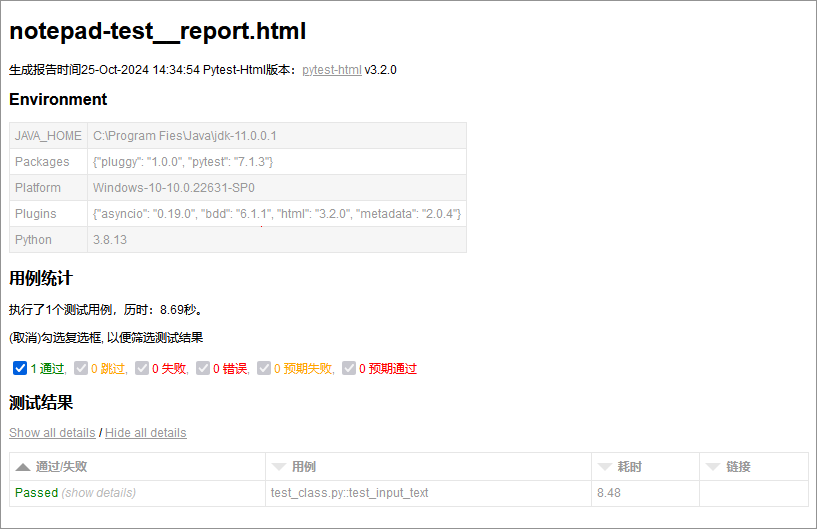
Run Project and Generate Test Report
In CukeTest, clicking the Run Project button on the project interface will run all test scripts written according to Pytest specifications. After execution, CukeTest will generate a detailed test report containing the following contents:
- Test Summary: Total number of test cases, number of passed and failed cases, etc.
- Detailed Results: Execution status (such as "Passed" or "Failed") and error information of each test step, facilitating analysis and debugging.
In addition, you can add custom screenshots to the report to increase the visualization and richness of information in the report. Refer to How to Add Extra Information to Report.