Developing BDD Projects with Python
Pytest-BDD is a Behavior Driven Development (BDD) framework based on the Pytest Testing Framework. It combines the simplicity and efficiency of pytest with the intuitive expression of the Gherkin language, making test code more readable and expressive. This tutorial will guide you to integrate automation code, application model files, and BDD scenario files to build a complete Pytest-BDD automation test project.
CukeTest has built-in support for pytest-bdd. For details, please refer to the Pytest-BDD User Guide.
How to Write Pytest-BDD Test Scripts
In Pytest-BDD, test scripts are used to implement steps in Gherkin scenarios.
1. Create Test Script File
First, open the test_feature1.py file in the project step_defs directory. This file is automatically generated when the project is created. You can also create new test script files anywhere in the project. Please ensure that the file name starts with test_ so that Pytest can correctly identify it as a test file. For example, test_notepad.py.
2. Associate Scenario File
The first step of the test script is to associate the Gherkin scenario file. Load our Sample Scenario via the scenarios() function so that Pytest-BDD can find the corresponding test scenarios:
scenarios("../features/notepad.feature")3. Define Step Functions
Step definition functions are the specific code used to execute automated tests, implementing various operations in the scenario. In Pytest-BDD, each Gherkin step (such as Given, When, Then) is implemented by a Python function. Using @given, @when, and @then decorators, you can associate these steps with specific Python functions.
Through the previous Recording Script, we have already generated all the automation operation codes and checkpoint codes needed for this test scenario. Next, we just need to implement the corresponding step definition functions based on the recorded codes in the order of the operation steps.
Tip: For desktop automation testing, when writing step definition functions, you need to ensure that the desktop automation module (e.g.,
WinAuto) and the corresponding Model File have been loaded.
3.1 Write Parameterless Step Functions
For example, the step to open the Notepad application:
@given("Open Notepad application")
def open_notepad():
    Util.launchProcess(r"C:\Program Files\LeanPro\CukeTest\bin\notepad.exe")
Here, the @given decorator associates the step "Open Notepad application" with the open_notepad() function.
3.2 Write Step Functions with Parameters
For steps containing parameters, you can use parsers.parse() to extract variables. For example, the following code demonstrates how to pass {text} as a variable from a Gherkin step to a Python function:
@when(parsers.parse('Enter "{text}" in the editing area'), target_fixture="expected_text")
def input_text(text):
    modelWin.getEdit("QTextEdit").set(text)
    return text
In this example, parsers.parse() extracts {text} from the step text and passes it as the text parameter to the input_text() function.
3.3 Use target_fixture to Pass Data Across Steps
Sometimes it is necessary to access previous parameters in subsequent steps. using target_fixture allows the parameter to be called in subsequent steps. For example, to check if the entered text is correct in the next step:
@then("Check if the entered text is correct")
def check_text(expected_text):
    modelWin.getEdit("QTextEdit").checkProperty("Text.text", expected_text)
In this example, target_fixture="expected_text" stores the return value of input_text() as expected_text for use by check_text().
Complete Test Script Example
The final test_feature1.py file example is as follows:
# test_feature1.py
from pytest_bdd import scenarios, given, when, then, parsers
from leanproAuto import RunSettings, WinAuto, Util
import os

RunSettings.set({"slowMo": 1000, "reportSteps": True})
modelWin = WinAuto.loadModel(os.path.dirname(os.path.realpath(__file__)) + "/notepad.tmodel")

# Load BDD scenario file
scenarios("../features/notepad.feature")

@given("Open Notepad application")
def open_notepad():
    Util.launchProcess(r"C:\Program Files\LeanPro\CukeTest\bin\notepad.exe")

@when(parsers.parse('Enter "{text}" in the editing area'), target_fixture="expected_text")
def input_text(text):
    modelWin.getEdit("QTextEdit").set(text)
    return text

@then("Check if the entered text is correct")
def check_text(expected_text):
    modelWin.getEdit("QTextEdit").checkProperty("Text.text", expected_text)

@when("Change font size to 36")
def change_font_size():
    modelWin.getButton("Font").click()
    modelWin.getList("QFontListView").select("36")
    modelWin.getButton("OK").click()

@then("Check if the font is modified successfully")
def check_font_size_change():
    modelWin.getVirtual("QTextEdit_image").checkImage()

@then("Close Notepad application")
def close_notepad():
    modelWin.getButton("Close").click()
Run Test Project and View Report
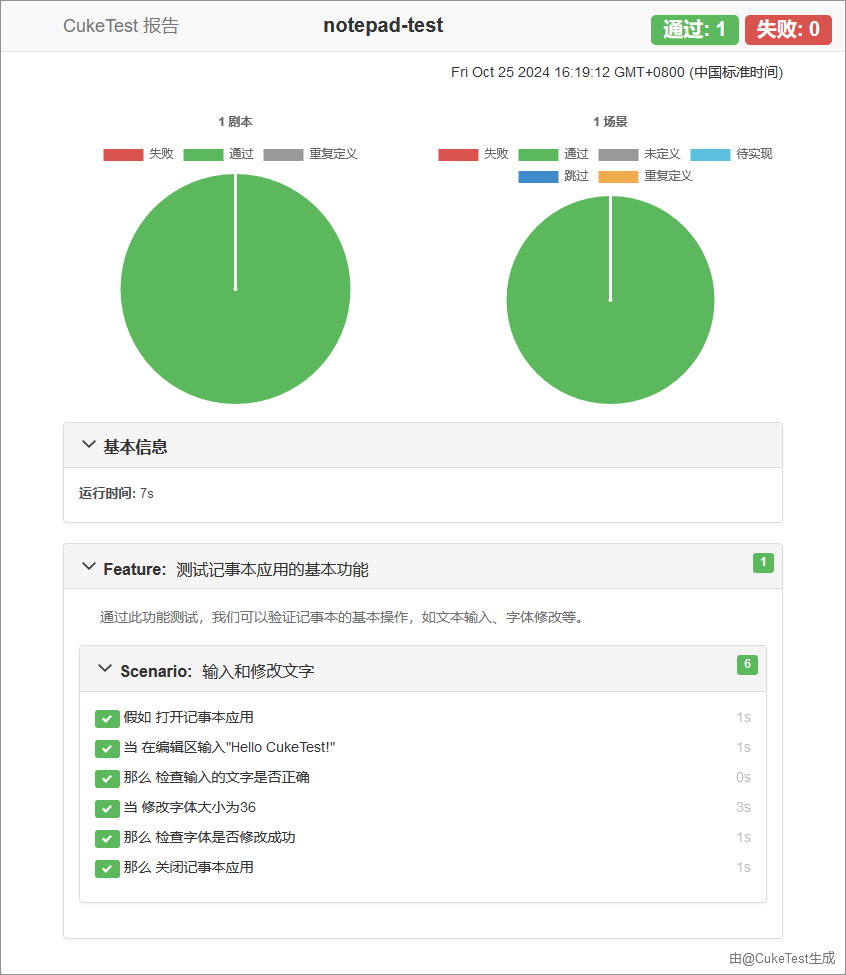
In CukeTest, clicking the Run Project button can execute all test scripts. CukeTest will automatically identify and run test files compliant with Pytest-BDD specifications, and generate a test report containing the test summary and detailed results:
- Test Summary: Lists total number of tests, passed and failed quantities, etc.
- Detailed Results: Execution status of each step (such as passed or failed), helping to locate problems.
The test report also supports custom screenshots or other attachments to enrich context information. Refer to Report Attachments in pytest-bdd to learn more.