Interface
1. Remote Recording
CukeTest supports remote recording, allowing users to easily record operations on remote devices and generate executable automation scripts locally.
How to Enable Remote Recording:
- In the CukeTest main interface, click the "Recording Settings" button.
- In the settings dialog, select and enable the "Remote Recording" option.
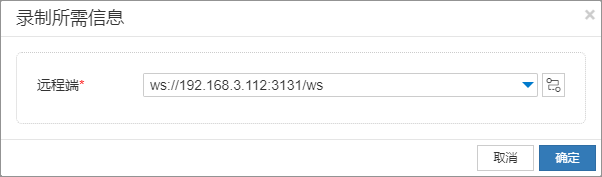
- Click the "Start Recording" button, and the "Information Required for Recording" dialog will appear.
- In the "Remote Address" input box of the dialog, enter the remote device address in the format, for example:
ws://192.168.1.10:3131/ws - After confirming the input is correct, click the "OK" button to start recording.
2. Remote Run and Playback
CukeTest supports sending automation scripts to remote devices for execution, thereby realizing remote automated testing. You can use scripts generated from Remote Recording directly, or modify local scripts to adapt to remote execution. CukeTest currently supports the following types of remote automated testing:
3. Using Model Manager
Through the Model Manager, you can develop remote automation scripts more efficiently. The following are the steps to use the Model Manager:
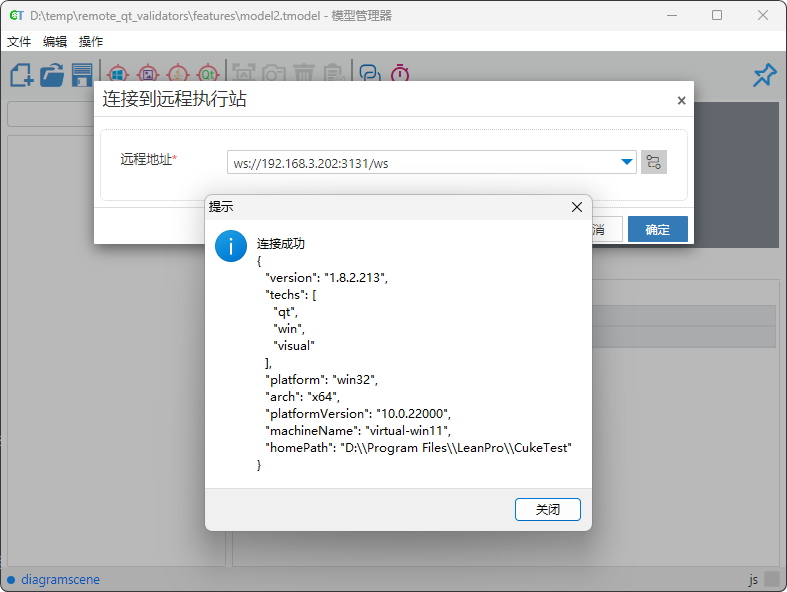
1. Connect to Remote Device
After Starting the Execution Station (Worker) on the remote device, you can connect to the remote desktop through the Model Manager to spy and add controls on the remote device.
Steps:
- Click the Remote Connection button
 on the toolbar.
 - Use the worker address to connect to the remote end.
- After successful connection, the remote desktop will be displayed on the screen, and the Model Manager will automatically switch to remote mode. You can perform the following operations:
- Launch Application: Launch an application in the remote desktop.
- Add Object: Add control objects from the remote desktop
 .
. - Highlight and Screenshot: Highlight
 and screenshot
  controls in the remote desktop.
2. Remote Desktop Preview Window
After establishing a remote connection, the Model Manager will pop up a preview window where you can view operations on the remote desktop and perform operations such as control spying and highlighting.
The toolbar of the preview window provides the following functions:
- Switch Screen: If multiple screens are connected to the remote end, you can choose which screen to preview.
- Refresh Preview: Force refresh the preview window to get the latest remote desktop information.
- Close Connection: Close the window and disconnect the remote connection.
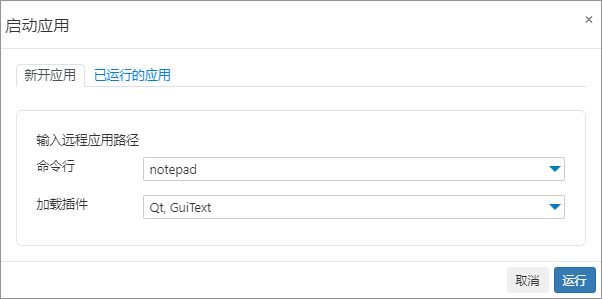
3. Launch Remote Application
After remote connection, you can select "Launch Application..." from the "Actions" menu in the menu bar, and enter the application path in the popup dialog to launch it. For example, to launch Notepad, enter "notepad" and click "Run". If the application starts successfully, you will see the application interface refresh.
4. Remote Spy Controls
Remote Spy Windows Controls
After connecting to a remote device, you can use the "Add Object" function of the Model Manager to spy remote controls. For example, click Add Windows Object to spy remote Windows controls and add them to the model.
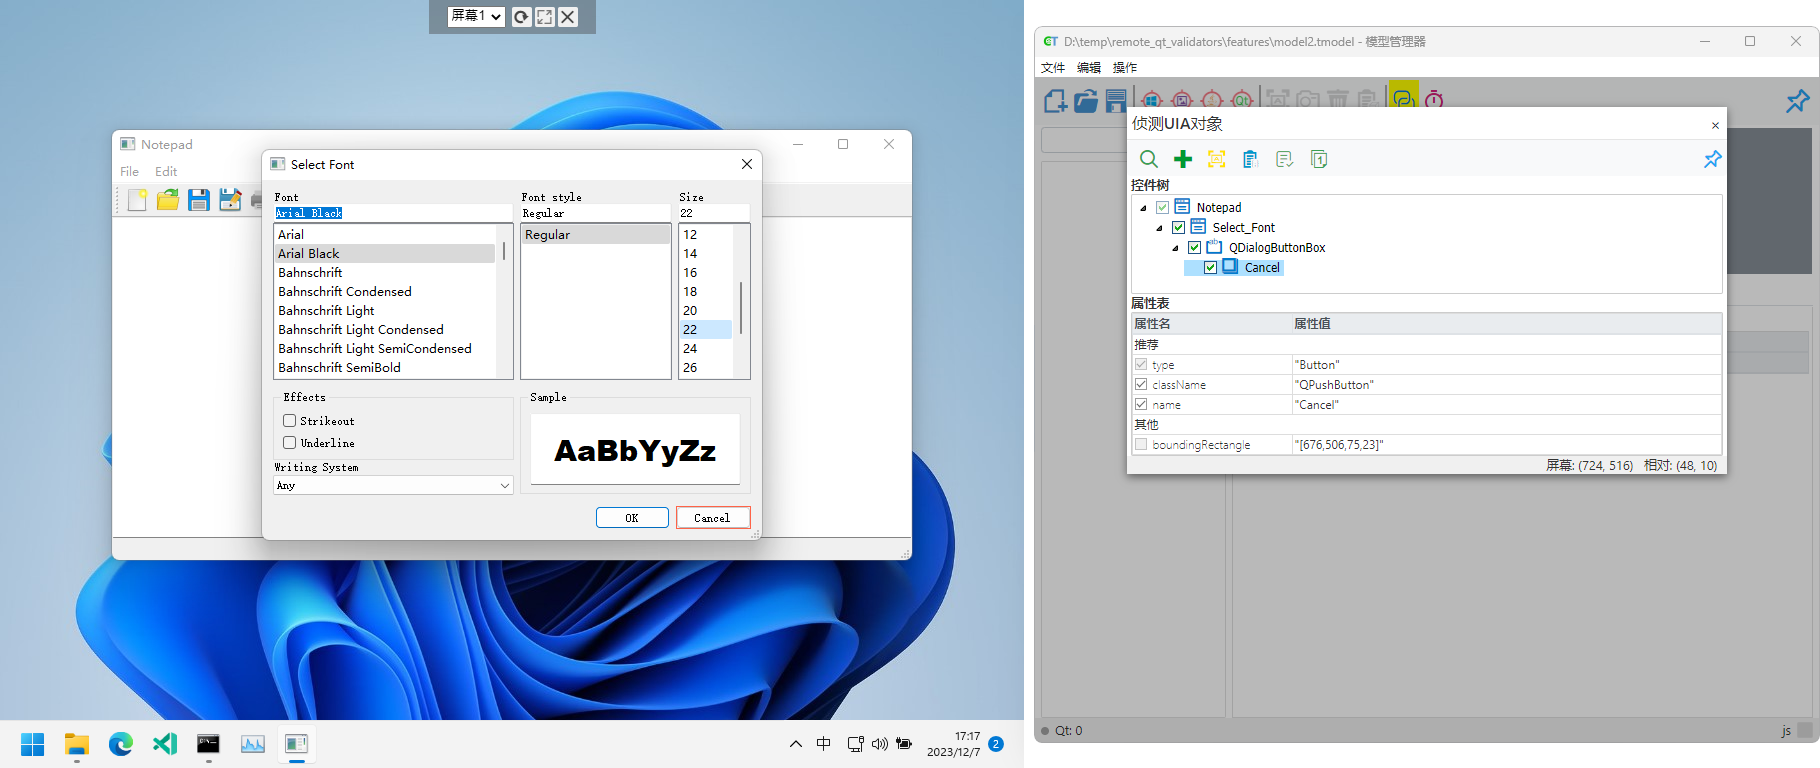
Remote Spy Qt Controls
After connecting to a remote device, you can also click Add Qt Object to remotely spy Qt controls. (Prerequisite: CukeTest has already been loaded into the Qt application)

5. Remote Highlight
Remote highlight operations will be executed in the remote desktop preview window. Even if there are identical controls on the local end, the operation will be displayed in the remote preview, not on the local end.
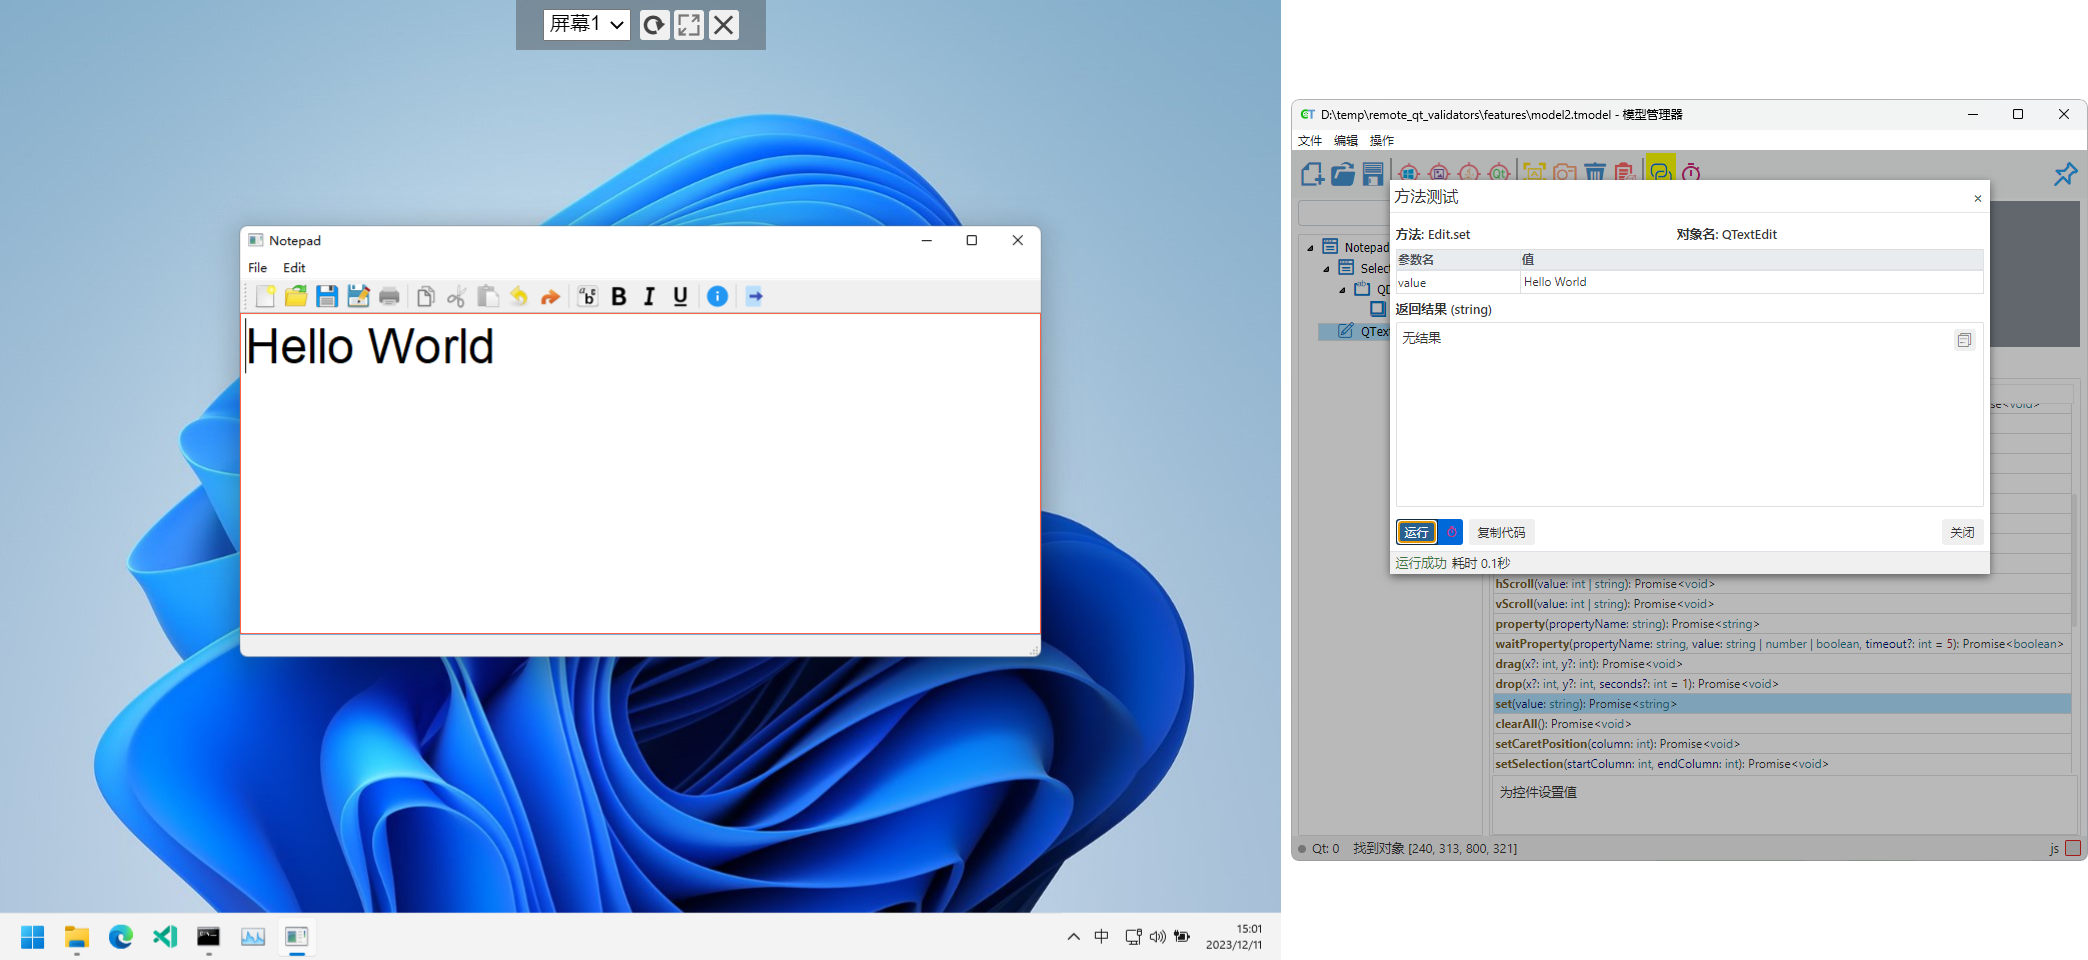
6. Remote Debugging
In the control operation page of the Model Manager, you can call control operation methods for remote debugging. For example, select the "Text Editor" object and call the set() method to enter Hello World in the remote Notepad. If the remote Notepad displays the correct content, the debugging is successful.
4. Troubleshooting
When using CukeTest for remote automated testing, you may encounter some problems. Here are common problems and solutions.
1. Unable to Connect to Remote Device
If you cannot connect to the remote device, it may be due to the following reasons:
- Firewall Settings: Check if the firewall of the remote device blocks external connections. Ensure the specified port (default 3131) is open and allows inbound connections.
- Incorrect Connection Address: Ensure the entered remote device address format is correct, check IP address, port information, and if the
ws://prefix is correct. - Virtual Network Card Issue: If the remote end displays multiple connection addresses, it may be interference from virtual network cards. Select the correct connection address.
- Worker Not Started properly: Please refer to the solution in Unable to Start Worker.
2. Unable to Start Worker
After starting, the Worker should display the device's connection address. If not displayed, it may be because the Worker has not started. Please check the following issues:
CukeTest Configuration Issue: Worker depends on CukeTest. If CukeTest fails to start correctly, Worker cannot work properly either. Please ensure the CukeTest main interface opens normally, then try restarting Worker.
Incorrect Software Version: Please note that the Worker function is not available in the Lite version of CukeTest. If you need to use the full Worker function, please Contact Us to obtain the appropriate version.