Java Automation Mechanism
CukeTest's Java application automation relies on the Java Access Bridge. To perform automated testing with CukeTest, you must first ensure that the Java Access Bridge is correctly enabled.
Enable Java Access Bridge
The Java Access Bridge is not enabled by default. If not enabled, CukeTest will not be able to interact with Java applications. Therefore, before automating Java applications, be sure to follow the steps below to enable the Java Access Bridge.
Enable via Control Panel
The Control Panel method is a simple way suitable for users unfamiliar with command-line operations. The steps are as follows:
- Open Control Panel: Click the "Start" menu and select "Control Panel". In Windows 10, you can search for "Control Panel" directly to open it.
- Access Ease of Access Center: In the Control Panel, select "Ease of Access", then click "Ease of Access Center".
Enable Java Access Bridge:
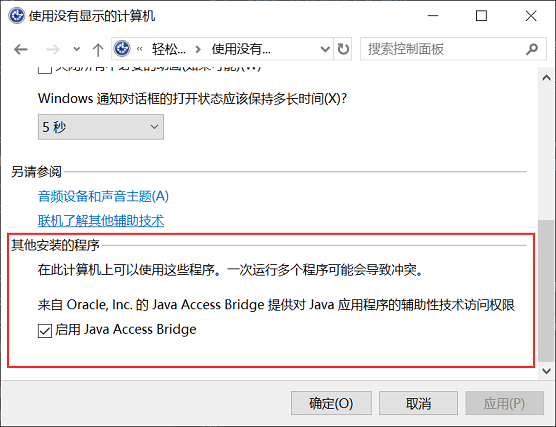
- In the Ease of Access Center, select "Use the computer without a display".
- Scroll down to the "Other programs installed" section and check the "Enable Java Access Bridge" checkbox.
- In Windows 7, you can find the relevant settings in "Start" -> "Control Panel" -> "Ease of Access" -> "Ease of Access Center".
Enable via Command Line
If you are more comfortable using the command line, or need to operate in an environment without a graphical interface, you can enable the Java Access Bridge using the jabswitch command.
- Open Command Prompt: Press
Windows+R, typecmdand press Enter, or search for "Command Prompt" in the "Start" menu. Navigate to the path of jabswitch.exe: In the Command Prompt, use the
cdcommand to switch to the directory where thejabswitch.exefile is located. Typically, this file is located in thebindirectory of the Java Runtime Environment (JRE). The path might look like this:cd C:\Program Files\Java\jre\bin\ jabswitch -enableIf you don't know the JRE installation directory, you can use the
%JRE_HOME%environment variable instead. For example:cd %JRE_HOME%\bin\ jabswitch -enable
Note: When ensuring Java Access Bridge is enabled via the command line, it only ensures that Java applications started within the same command line are recognized. Therefore, if you enable Java Access Bridge via the command line, make sure to start your Java application in the same command line window.
Spy Java Control
After enabling the Java Access Bridge, you can use CukeTest's Model Manager to spy on controls in Java applications.
Direct Spy
- Open Model Manager: In the CukeTest interface, find and open the Model Manager.
Spy Java Control: In the toolbar of the Model Manager, select the
Spy Java Controlbutton. At this point, you can move your mouse over any control in the Java application to spy on it.
Add Control to Model: After clicking on the control you want to operate in the Java application, the Spy Dialog will pop up. In this dialog, you can select the "Add" button to add the control to your model file.

Browse/Add
Click the small arrow at the bottom of the Spy Java Control icon, and in the expanded menu, select Browse/Add. This will open a control tree window displaying all currently detected Java applications. You can expand the control tree layer by layer to view the control structure and check the controls you want to add. You can also click the Spy button inside the "Control Tree" window and move the mouse to any control in the Java application for detection, and the control tree will automatically expand to the corresponding level.
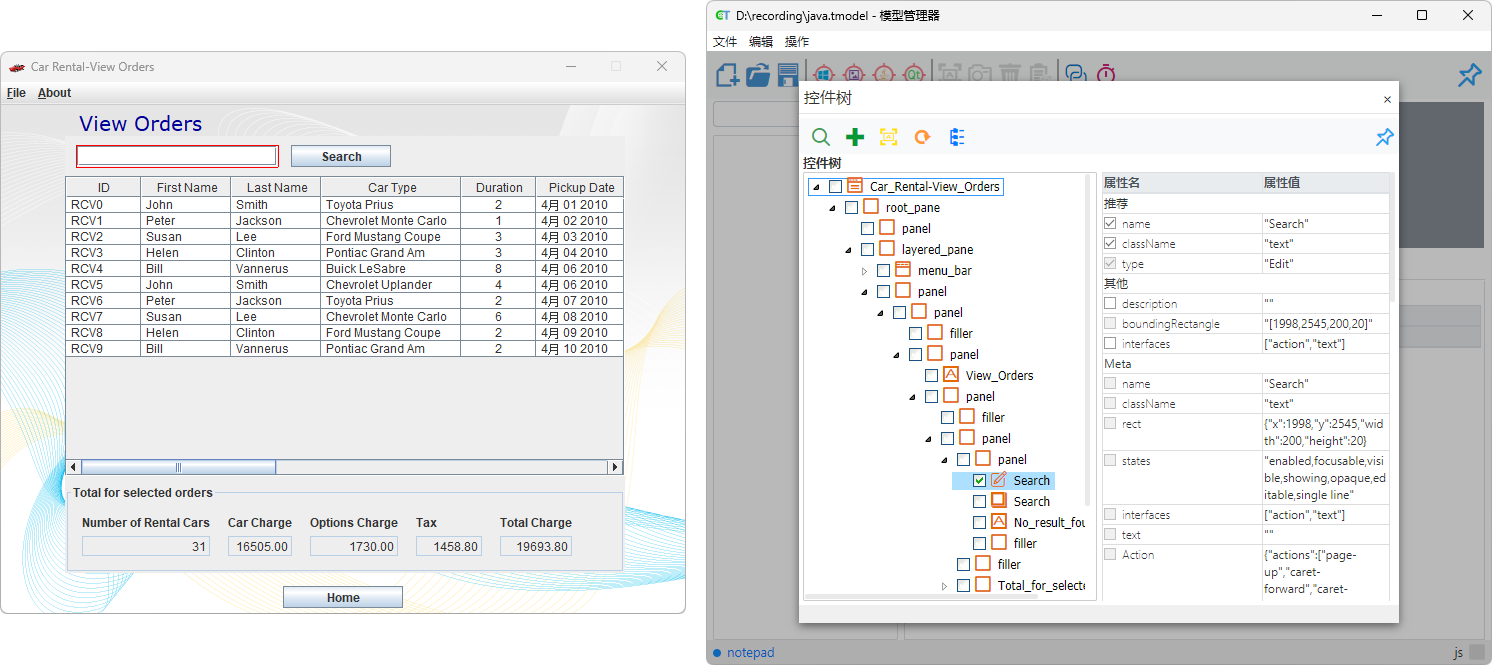
You may notice that the icon color of Java objects is orange, which is different from Windows controls (blue).
Java Model Reference Script
The automation API for Java controls differs from that of Windows controls, so a specific method is required when loading Java model files. We recommend using the code generation feature in the Model Manager provided by CukeTest. The specific operations are as follows:
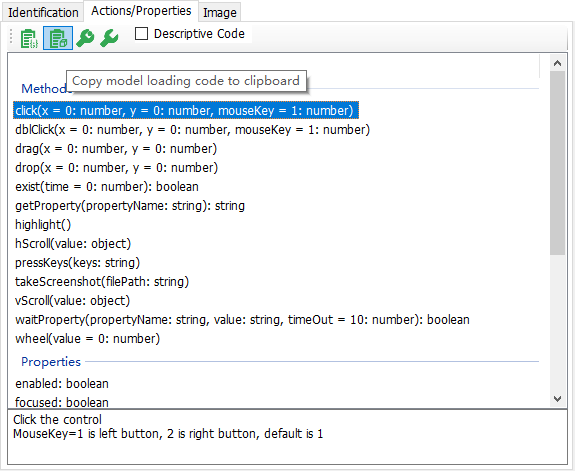
- Open Model Manager: In the Model Manager interface, select the "Control Operations" tab on the right side, which will switch to the method panel.
Copy Model Loading Code: In the method panel, click the button shown below to automatically copy the global loading code method to the clipboard:
Paste Code to Editor: Open your code editor and paste the code from the clipboard into your script file.
The generated code should look similar to the following format:
const { JavaAuto } = require("leanpro.java");
let model = JavaAuto.loadModel("ProjectDir\\model1.tmodel");
from leanproAuto import JavaAuto
model = JavaAuto.loadModel("ProjectDir\\model1.tmodel")