Managing Model Objects
The Model Manager displays all test objects in the current model as a hierarchical tree, allowing users to intuitively view and manage these objects. Clicking any node in the object tree displays detailed information about the object in the right panel, including its name, type, and screenshots.
The lower section of the details panel contains three main tabs to help you efficiently manage object identification attributes, available operations, and control screenshots:
- Object Properties: Set the properties used for object identification. For more details, see Object Attributes.
- Control Operations: List all executable methods for the object and allows generation of call scripts. See Control Operations.
- Control Screenshots: Manage screenshots of the control, usable for creating pattern or virtual controls. For details, see Control Snapshots.
Working with the Object Tree
- Move Node Up (
Ctrl + ↑): Move the selected node up within its current level. - Move Node Down (
Ctrl + ↓): Move the selected node down within its current level. - Drag & Drop Operations:
- Copy Node: Hold
Ctrlwhile dragging the node to the target location to copy it. - Copy Subtree: Hold the left mouse button on the root of a subtree, then press
Ctrl + Shiftwhile dragging the subtree to the desired location.
- Copy Node: Hold
- Undo (
Ctrl + Z): Undo the last operation. - Redo (
Ctrl + Shift + Z): Redo the last undone operation. - Delete Node (
Del): Delete the currently selected node.
Modifying the tree structure or nodes may affect identification results. It is recommended to use the Highlight feature while making changes to verify recognition.
Working with Object Nodes
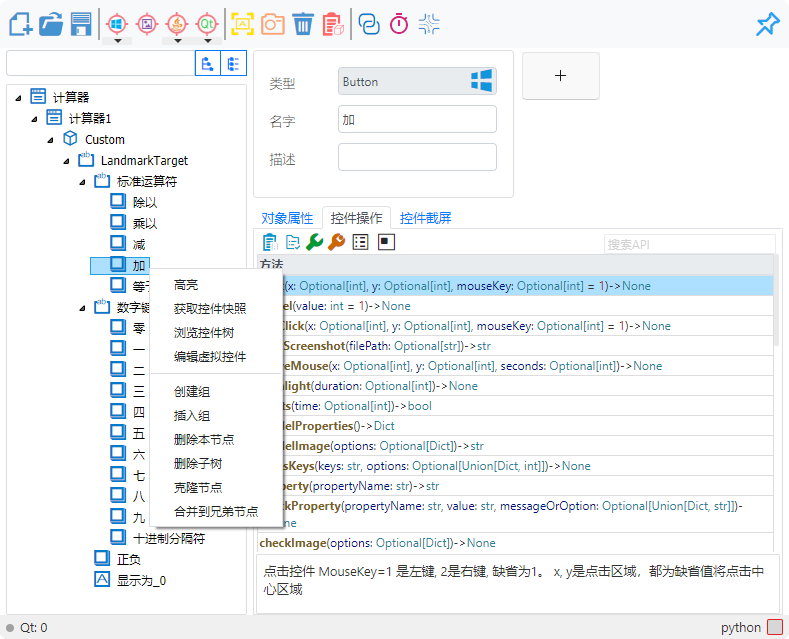
Right-clicking a model object opens a context menu with quick options for common operations:
Highlight Control
Highlight Control  is one of the most frequently used features. It helps quickly locate the target control by drawing a red frame on the screen and shows its coordinates and size in the status bar.
Tip: If the object is not found, you may see
1001: Object not foundor1002: Control out of screen. If the highlight indicates a match but no frame is visible, check the coordinates and size in the status bar to see if the control is off-screen or has zero dimensions.
You can configure whether selected objects are highlighted automatically in Options.
Capture Control Screenshot
This feature captures the current state of the control, similar to the Screenshot toolbar button. For detailed instructions, see Control Snapshots.
Browse Control Tree
Use the “Browse/Add” feature to view the control hierarchy of the current application and locate selected controls directly. For more information, see Batch Add Controls.
Edit Virtual Controls
You can define specific areas of the interface as controls to achieve precise automation on complex interfaces. See Virtual Controls Guide for details.
Create and Manage Control Groups
When managing a large number of model objects, grouping helps categorize controls. Logical grouping does not affect control identification or execution.
- Create Group: Create a new group under the selected control.
- Insert Group: Insert a group at the selected position and place selected objects into it. Other objects can also be dragged into the group.
Delete Node
- Delete Node: Removes only the selected object; child objects are moved under the parent.
- Delete Subtree: Removes the selected object and all its child objects.
Clone Node
Copy the current object at the same hierarchy level for reuse. You can also hold Ctrl and drag the object to copy it quickly.
Merge into Sibling Node
If duplicate parent objects exist in the model, use Merge into Sibling Node to consolidate them. Child objects are recursively merged until no duplicates remain. Objects must have identical identifying attributes.
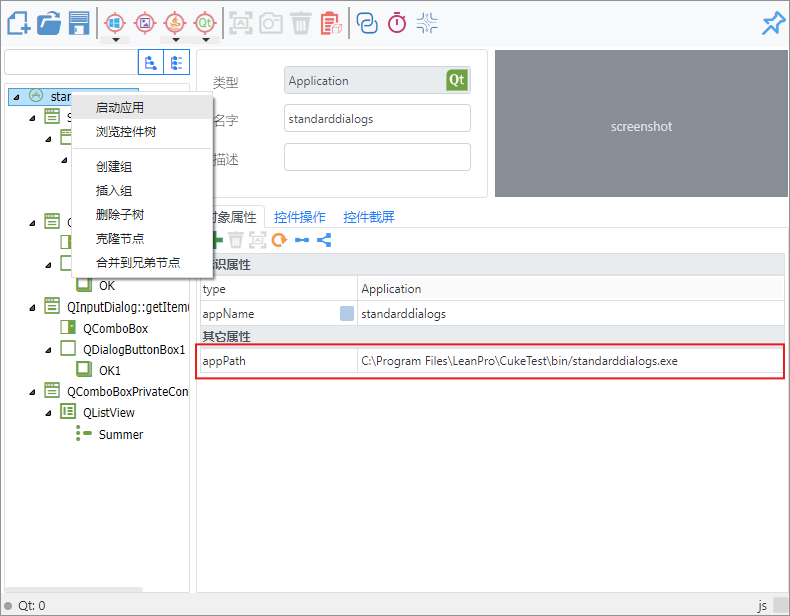
Launch Application
If the root node of the model tree (UIA root is usually a Window control, Qt root is typically an Application) contains the appPath property (path to the executable), you can right-click the root node and select Launch Application from the context menu.
Delayed Execution
The Delayed Execution feature allows you to set a delay before performing operations such as spying, highlighting, or capturing screenshots. This is useful for controls that require time to load, ensuring they are fully displayed before interaction.
Copy Model Code
Copy Model Code  allows you to generate code to reference model files. This code loads control information from model files in scripts. Controls of different technologies require the corresponding reference modules.
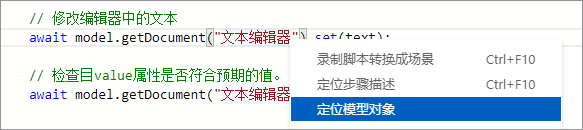
Locate Model Objects from Scripts
During automation script development, you can right-click an object name in the script and select Locate Model Object to quickly navigate to the corresponding object in the Model Manager.